
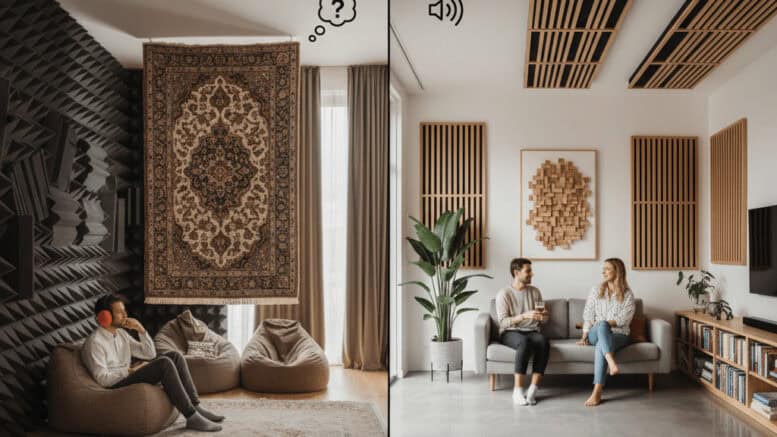
Acoustic panels are common in offices studios and homes where people want clearer sound and less echo. Despite their popularity many myths and misunderstandings circulate about what these panels actually do and how well they work. This article sorts fact from fiction so you can make smart choices about sound treatment.
I will explain the main misconceptions around acoustic panels how they interact with room sound and what to expect when you add them to a space. You will find practical tips on placement product selection and simple tests to check performance. If you want a local reference in Dutch for practical examples here is a useful article about akoestische panelen that shows real installations and experiences.
Misconception 1 Panels will soundproof a room
One of the biggest mistaken ideas is that acoustic panels block sound from leaving or entering a room. In reality panels are designed to absorb reflected sound inside a room. They reduce echoes and improve speech intelligibility but do not block airborne transmission through walls floors or windows.
Soundproofing calls for mass and sealing. Materials such as heavy plasterboard multiple layers of drywall damping compounds and sealed frames reduce transmission. Acoustic panels can complement those measures by improving the listening environment once the sound is already contained.
Misconception 2 All panels perform the same
Not all panels behave the same. Performance varies by material thickness density and internal structure. Manufacturers publish absorption coefficients and noise reduction data that show how much sound a product removes at specific frequencies. Look at performance numbers rather than relying on appearance alone.
What absorption coefficients mean
An absorption coefficient is a number from 0 to 1 that indicates how much sound is absorbed at a given frequency. A value close to 1 means most of the energy at that frequency is absorbed. Panels that cite performance only at high frequencies may still leave mid and low frequencies untreated.
Why lab numbers differ from room results
Lab measurements use standard fixtures and controlled conditions. A room has furniture windows and non parallel surfaces so results vary. Expect real world improvement but allow for differences between published figures and what you hear.
Misconception 3 Thicker is always better
Thickness matters but only with relation to frequency. Thin panels with dense cores often absorb higher frequencies well. Low frequency energy needs thicker or specially designed absorbers. A thick panel placed in the wrong location will not reduce bass problems effectively.
Practical tip For bass control consider placing thicker panels in corners or use membrane absorbers or resonant traps. A single 50 millimeter panel can make a room sound less sharp but will not tame a booming bass problem.
Misconception 4 A decorative panel is just cosmetic
Many modern panels combine form with function. Fabric wrapped panels printed panels and wooden slat diffusers can look attractive and still improve room acoustics. The key is to check the acoustic specification and how the visual treatment affects absorption.
Example A decorative wooden slat panel may scatter mid and high frequencies while offering limited absorption. Paired with an absorber behind the slats the result can be both effective and attractive.
Misconception 5 Placement does not matter
Placement is one of the most common factors that people overlook. A high quality absorber installed in the wrong spot may not fix the issues you hear. Reflections come from surfaces that bounce sound between listeners and sources. Treating first reflection points and ceiling reflections often produces the largest perceived improvement.
How to find first reflection points
A simple method uses a mirror. Sit in the listening position and have someone move a mirror along the wall until you can see the speaker or the sound source in the mirror. The mirror location marks a reflection point worth treating.
Ceiling and corner strategies
Ceiling clouds placed above the listening area reduce vertical reflections and help recording spaces. Corners collect low frequency energy. Use bass traps or thicker absorbers in corners to manage excess low end.
Misconception 6 You can judge effectiveness by sight alone
People often decide panels are working because they look padded or feel dense. The right test is how the room sounds and the measurable changes in reverberation. A quick listening test may be convincing but a simple measurement provides objective evidence.
Measurement tips Use a clap test to estimate reverberation changes. Clap once near the center and listen for the decay time. Repeat before and after treatment. For a more accurate reading use a smartphone app that records RT60 values or a simple calibrated meter if available.
Misconception 7 DIY panels always match commercial options
DIY panels can be effective when built with correct materials and thickness. However many DIY projects use inexpensive fillings that compress over time lose structure or offer less predictable absorption. Commercial panels often use specific core materials treated for fire resistance and long term stability.
Cost consideration If budget is tight combine a few commercially rated panels at reflection points with economical DIY panels in less critical locations. This hybrid approach gives measurable gains without overspending.
Choosing the right solution for your room
Start with the problem statement. Is speech clarity the main issue or is the concern rumbling bass or background noise from outside? The answer directs your approach. For speech clarity treat early reflections and add mid high frequency absorbers. For bass control plan for thicker absorbers placed in corners.
- Step one Identify the main complaint and the listening positions.
- Step two Assess room surfaces and likely reflection points.
- Step three Select panels with published absorption data at frequencies that match your problem.
- Step four Install and run simple tests to confirm results then adapt if needed.
Example A mid sized office with echo from hard walls will see quick gains from 50 to 100 millimeter panels at wall reflection points combined with a ceiling cloud. A small rehearsal room with muddy bass will require thicker corner traps or tuned membrane absorbers to have impact.
How to evaluate brands and specs
Compare manufacturer data sheets and look for independent test results where possible. Pay attention to fire ratings and VOC content for indoor air quality. If you need certification for a commercial build check local building codes and product compliance documentation.
Warranty and longevity matter. Some panels retain shape and absorption over many years while others compress and lose effectiveness. Ask for expected lifespan and any cleaning or maintenance instructions.
Practical tips for real world improvement
- Target first reflection points and ceiling reflections for fast audible gains.
- Use a mix of absorbers and diffusers to avoid an overly dead room when musical quality is important.
- For bass issues install thicker elements in corners or use tuned traps for specific problematic frequencies.
- Test with simple clap tests then refine with measured RT60 if possible.
- Consider furniture rugs and bookshelves as part of the treatment plan since soft surfaces contribute absorption.
When choosing panel color and finish think about placement and how people will interact with the space. Panels mounted near work areas should meet local fire rules and resist staining. For recording spaces avoid reflective furniture directly opposite the source.
Budgeting tip Spend first on the areas that create the largest audible change. Early reflection treatment and ceiling clouds give sensible returns before covering every wall in panels.
Common error Expecting immediate total silence is unrealistic. The goal is improvement in speech clarity and balanced tonal response not complete deadening. A treated space should sound natural while having reduced flutter echo and less masking noise from reflections.
Final testing approach After installation leave the room for a while then return and listen at different positions. Walk around to check for spots where echo remains. Adjust placement and add or move panels in small steps until the result meets your needs.
Conclusion
Acoustic panels offer real value when chosen and installed with the right expectations. They do not block sound transmission but they reduce reverberation and improve clarity. Material density thickness and placement determine how well a panel performs for mid high or low frequencies. Practical steps include treating first reflection points using a mirror testing with claps and measuring with simple tools. For low frequency problems use thicker absorbers or corner traps. Combine visual preferences with published absorption data and check fire safety and durability. If you are starting a project identify the main complaint then treat the most influential spots first. Small changes often produce significant improvement so begin with a few well placed panels then expand if needed. If you want local examples and further reading there are articles that show installations and outcomes.
If you would like help planning treatment for your room start by describing the space dimensions main materials and the main sound problem. I can suggest where to place panels rough size estimates and an order of priority that fits your budget and goals. Take the first step and we can map a practical plan that improves how the space sounds.